Free checklist · PDF
Drop ceiling installation checklist
Tools, materials and steps for installing a drop ceiling, on one printable checklist.
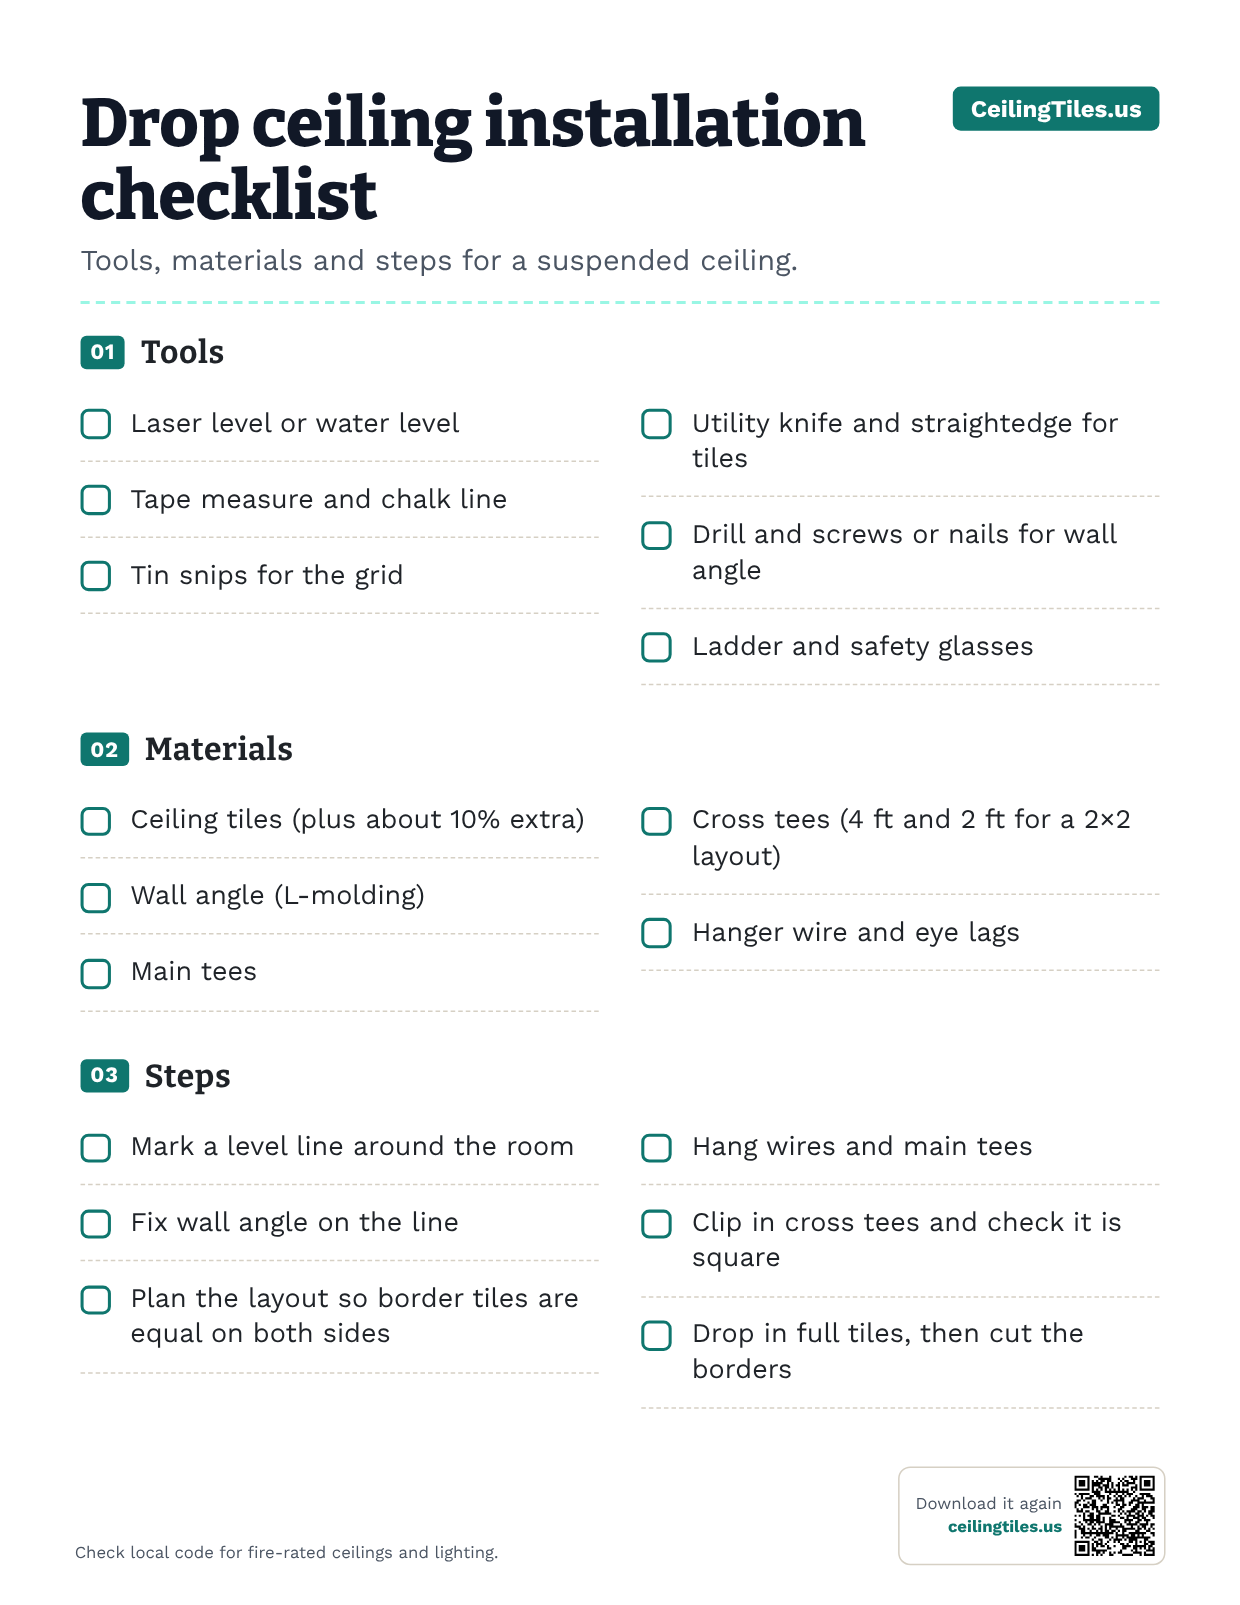
1 page, US Letter size, 60 KB. Free, no sign-up.
You can tick the boxes and type into this PDF on a computer or phone, then save or print it.
Share it
PinterestFacebookWhatsAppEmail
Printing tips
- Print at actual size (100%), not "fit to page", so the lines stay a usable size.
- It is laid out for US Letter paper and also fits A4.
- Turn on "background graphics" if the colors come out pale.
What is on this checklist
Tools
- Laser level or water level
- Tape measure and chalk line
- Tin snips for the grid
- Utility knife and straightedge for tiles
- Drill and screws or nails for wall angle
- Ladder and safety glasses
Materials
- Ceiling tiles (plus about 10% extra)
- Wall angle (L-molding)
- Main tees
- Cross tees (4 ft and 2 ft for a 2×2 layout)
- Hanger wire and eye lags
Steps
- Mark a level line around the room
- Fix wall angle on the line
- Plan the layout so border tiles are equal on both sides
- Hang wires and main tees
- Clip in cross tees and check it is square
- Drop in full tiles, then cut the borders